Editing Feature Presets
You can edit the default feature presets, which will then be available for all models, or you can edit the copy that is saved with the model itself. In most cases, it is usually better to edit the copy that is saved with the model.
- Do one of the following:
- If you want to edit the copy of the preset that is saved with the classifier, right-click the dataset feature in the features tree and then choose Edit in the pop-up menu.

- If you want to edit a default preset, right-click the preset in the Dataset Features box and then choose Edit in the pop-up menu.

The Feature Presets dialog appears. See Feature Presets for information about the Feature Presets dialog.
- If you want to edit the copy of the preset that is saved with the classifier, right-click the dataset feature in the features tree and then choose Edit in the pop-up menu.
- Do one of the following:
- Check the Auto-Generate Description option, recommended. If selected, the description of the filters in the preset and their settings will updated automatically.
- Edit the description in the edit box. Make sure that the Auto-Generate Description option is not selected.
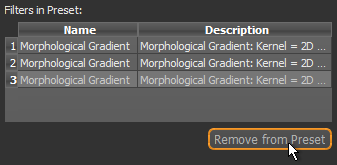
- Remove any filters from the preset that are not required.
- To do so, select the filter you want to remove in the Filters in Preset box and then click the Remove from Preset button.
- To do so, select the filter you want to remove in the Filters in Preset box and then click the Remove from Preset button.
- Add any filters that you want to include in the preset.
- To do so, select the required filter(s) in the Available Filters box and then click the Add to Preset button.

- To do so, select the required filter(s) in the Available Filters box and then click the Add to Preset button.
- Edit the filter settings, as required.

Refer to the topic Image Filters and Settings for information about selecting filter settings.
- Preview the filtering effects on the input dataset(s), recommended.
To preview filtering effects, select a dataset input in the drop-down menu and then click the Preview button.
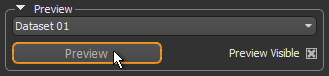
NOTE You can toggle between the preview and the original image by checking and unchecking the Preview Visible box. You can also preview filtering effects on different image slices.
- Modify the filter settings, if required.
- Do one of the following:
- Click the Save button to save the modifications you made to the feature preset.
- Click the Save as New Preset button to create a new feature preset.
Whenever a preset is added to the features tree, a copy is made and saved automatically with the model. You can then edit the copy without changing the default settings. You can also edit the default region feature presets, if required.
- Do one of the following:
- If you want to edit the copy of the preset that is saved with the classifier, right-click the region feature in the features tree and then choose Edit in the pop-up menu.

- If you want to edit a default preset, right-click the preset in the Region Features box and then choose Edit in the pop-up menu.

The Feature Presets dialog appears. See Feature Presets for information about the Feature Presets dialog.
- If you want to edit the copy of the preset that is saved with the classifier, right-click the region feature in the features tree and then choose Edit in the pop-up menu.
- Do one of the following:
- Check the Auto-Generate Description option, recommended. If selected, the description of the filters in the preset and their settings will updated automatically.
- Edit the description in the edit box. Make sure that the Auto-Generate Description option is not selected.
- Remove any filters from the preset that are not required.
- To do so, select the filter you want to remove in the Filters in Preset box and then click the Remove from Preset button.

- To do so, select the filter you want to remove in the Filters in Preset box and then click the Remove from Preset button.
- Add any filters that you want to include in the preset.
- To do so, select the required filter(s) in the Available Filters box and then click the Add to Preset button.

- To do so, select the required filter(s) in the Available Filters box and then click the Add to Preset button.
- Edit the filter settings, as required.
See Image Filters and Settings for information about selecting filter settings.

Refer to the topic Region Features for information about selecting the region information and settings. You should note that you can only preview a region feature after it is added to the features tree (see Previewing Feature Presets).
- Do one of the following:
- Click the Save button to save the modifications you made to the feature preset.
- Click the Save as New Preset button to create a new feature preset.


